
Developer Documentation
Welcome to the Clickterm developer documentation!
Clickterm provides you with all the tools to manage clickwraps for your apps and projects. A clickwrap can be your app's Terms and Conditions:
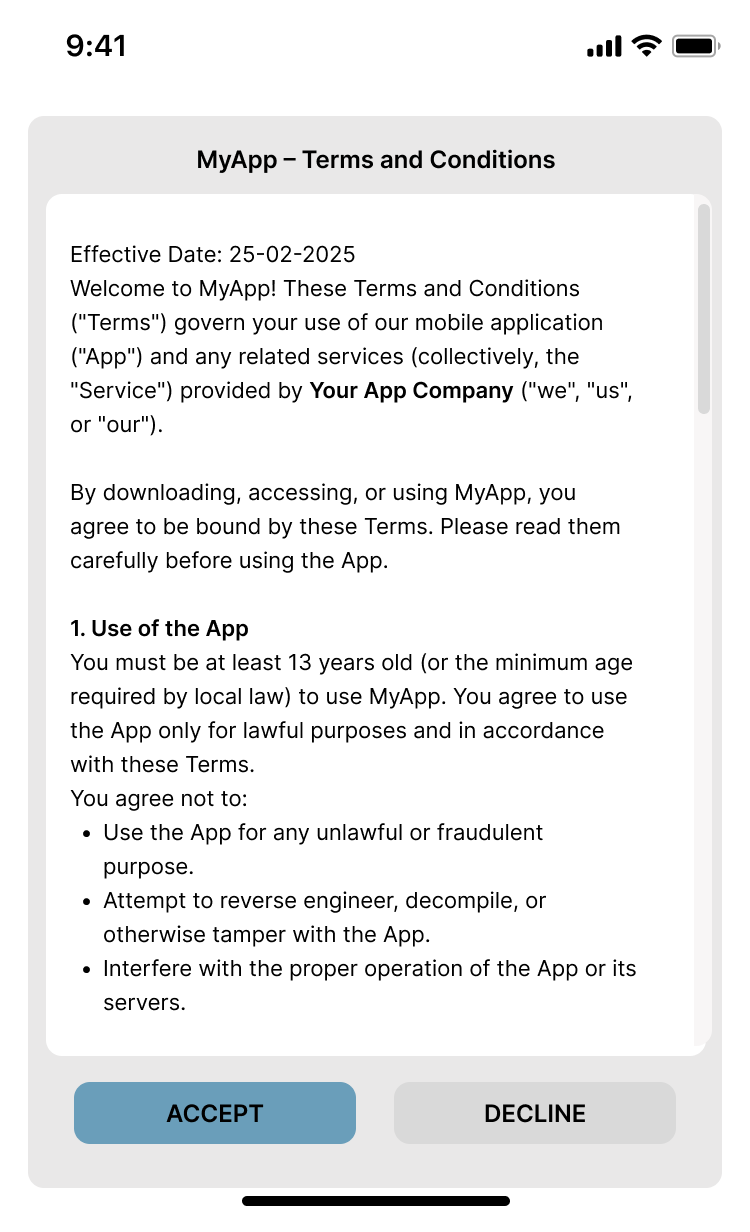
You can use our Client SDKs to display Clickwraps to your end-users and use Clickterm's frontend at app.clickterm.com to manage templates, versions, adoption and much more.
Quick Start
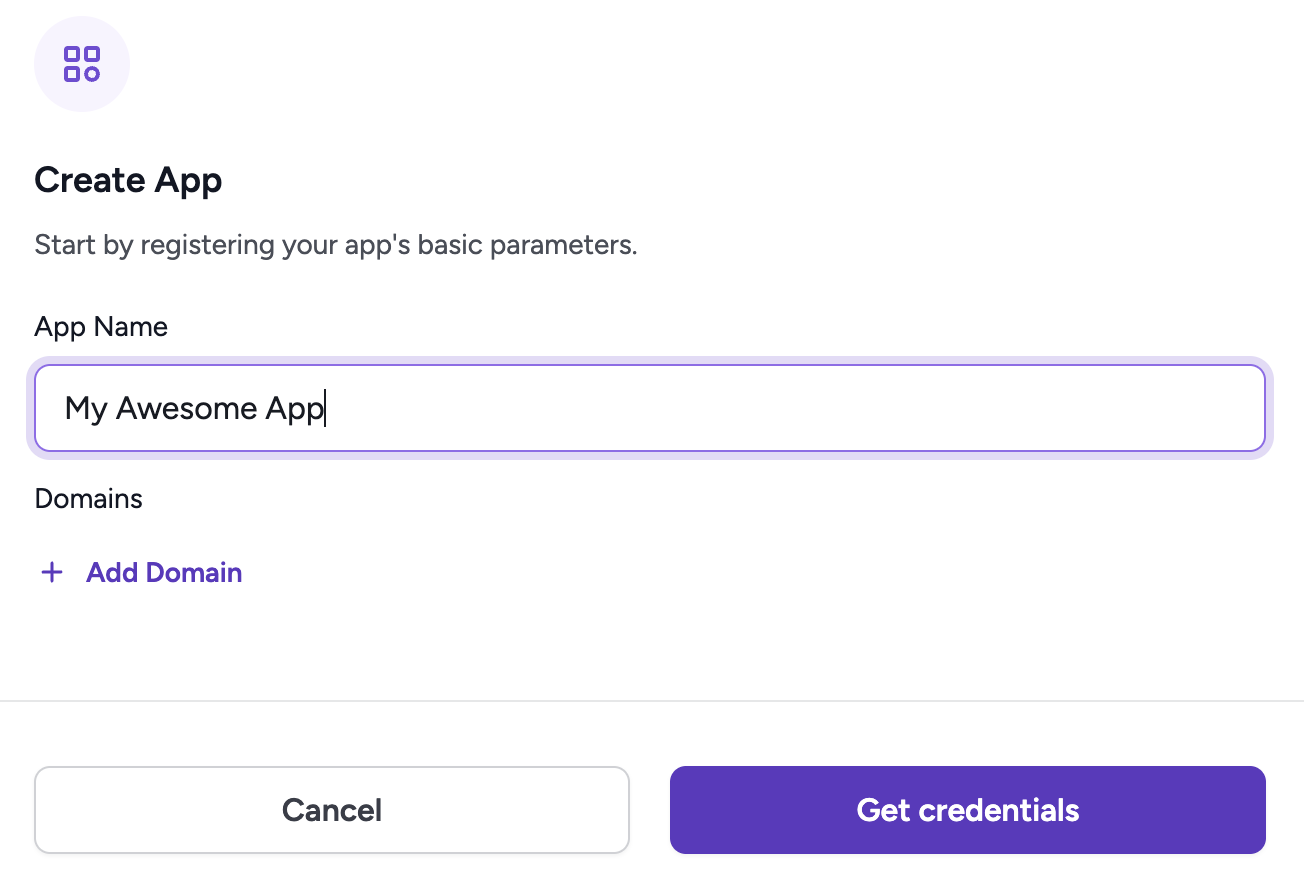
1. Creating an App
Once you have your Clickterm account (sign-up) you can head to the Integrations menu and add a new Integration.
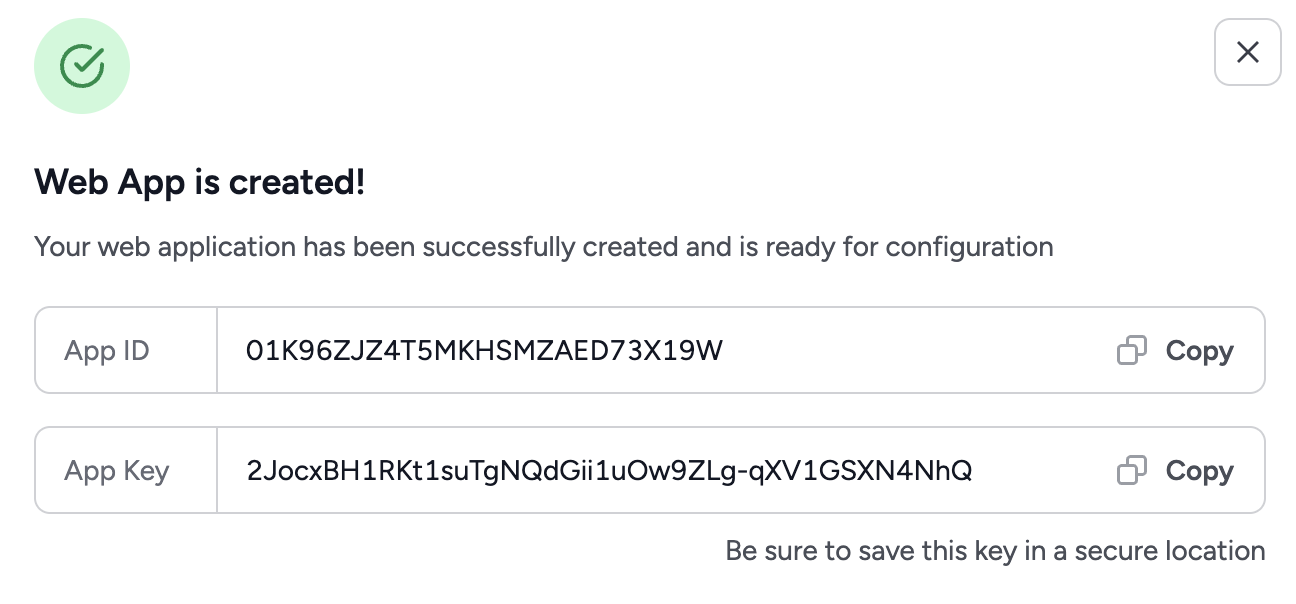
Once the App as been created, you will be presented with your App Id and App Key. You will need these 2 at different points of the integration process to validate and authenticate your interactions with the Clickterm SDKs and REST API
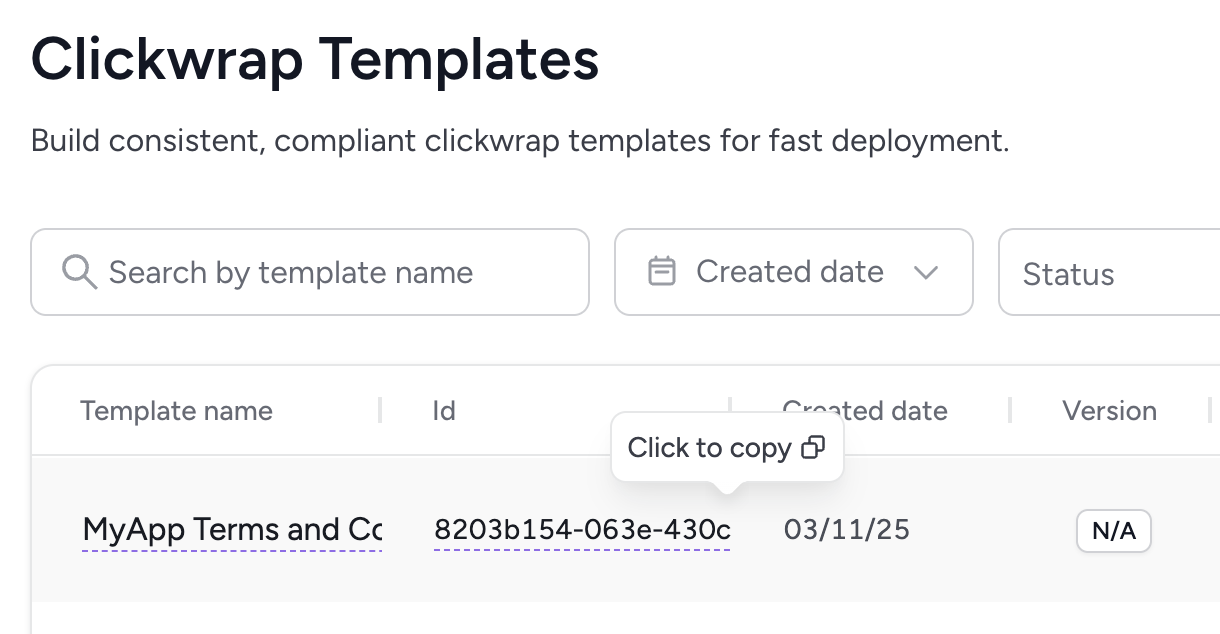
2. Creating a Template
The next step is to create a Clickwrap Template in the Templates menu. Choose a name and select Create Content.
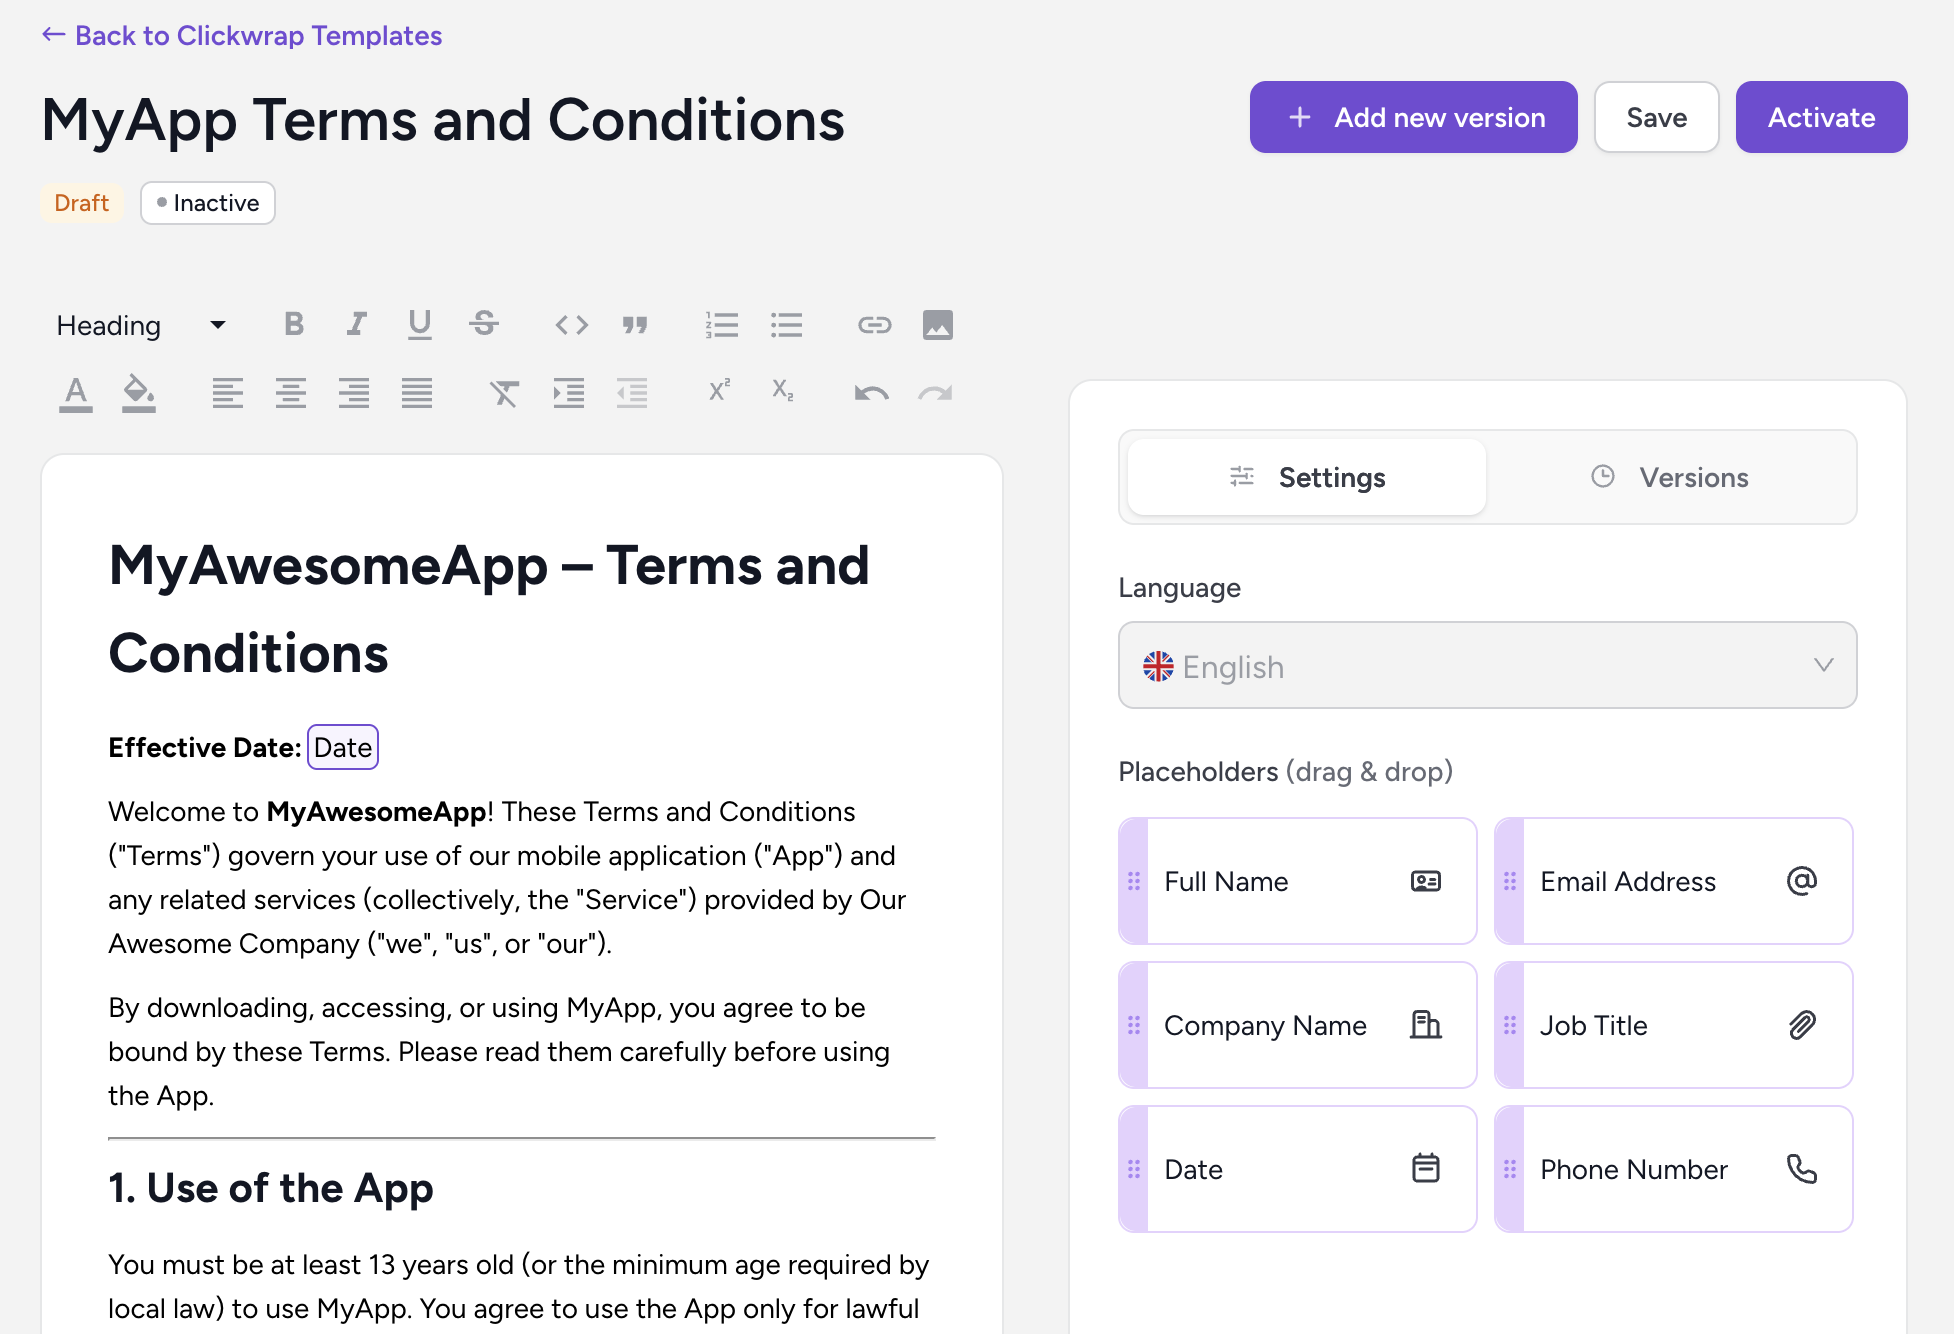
Here you can add your text and take advantage of our Clickwrap Placeholders. These dynamic pieces of data can be provided to our Client SDKs and will be inserted to your Template Content to further personalize your clickwrap.
3. Publishing your Template's Content
You can save your content as a Draft at any time, and when you are ready, Publish it, which will lock the Content and save it as a new version. You can publish aditional versions in the future if you want to make changes to your content.
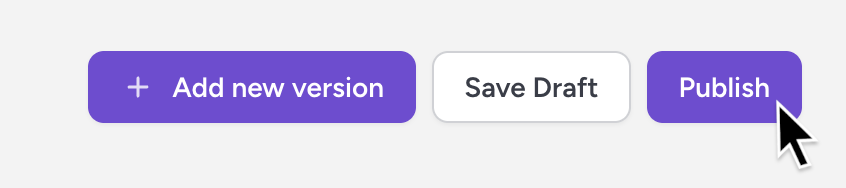
4. Enabling your Template
After you publish the Template content, you must Enable the Template from the Templates table to make it available for client clickwrap requests. You can Disable the Template at any time to stop new requests from using it.

Once your Template has been created, you will need to retrieve the Clickwrap Template Id, which you will need in the following steps.
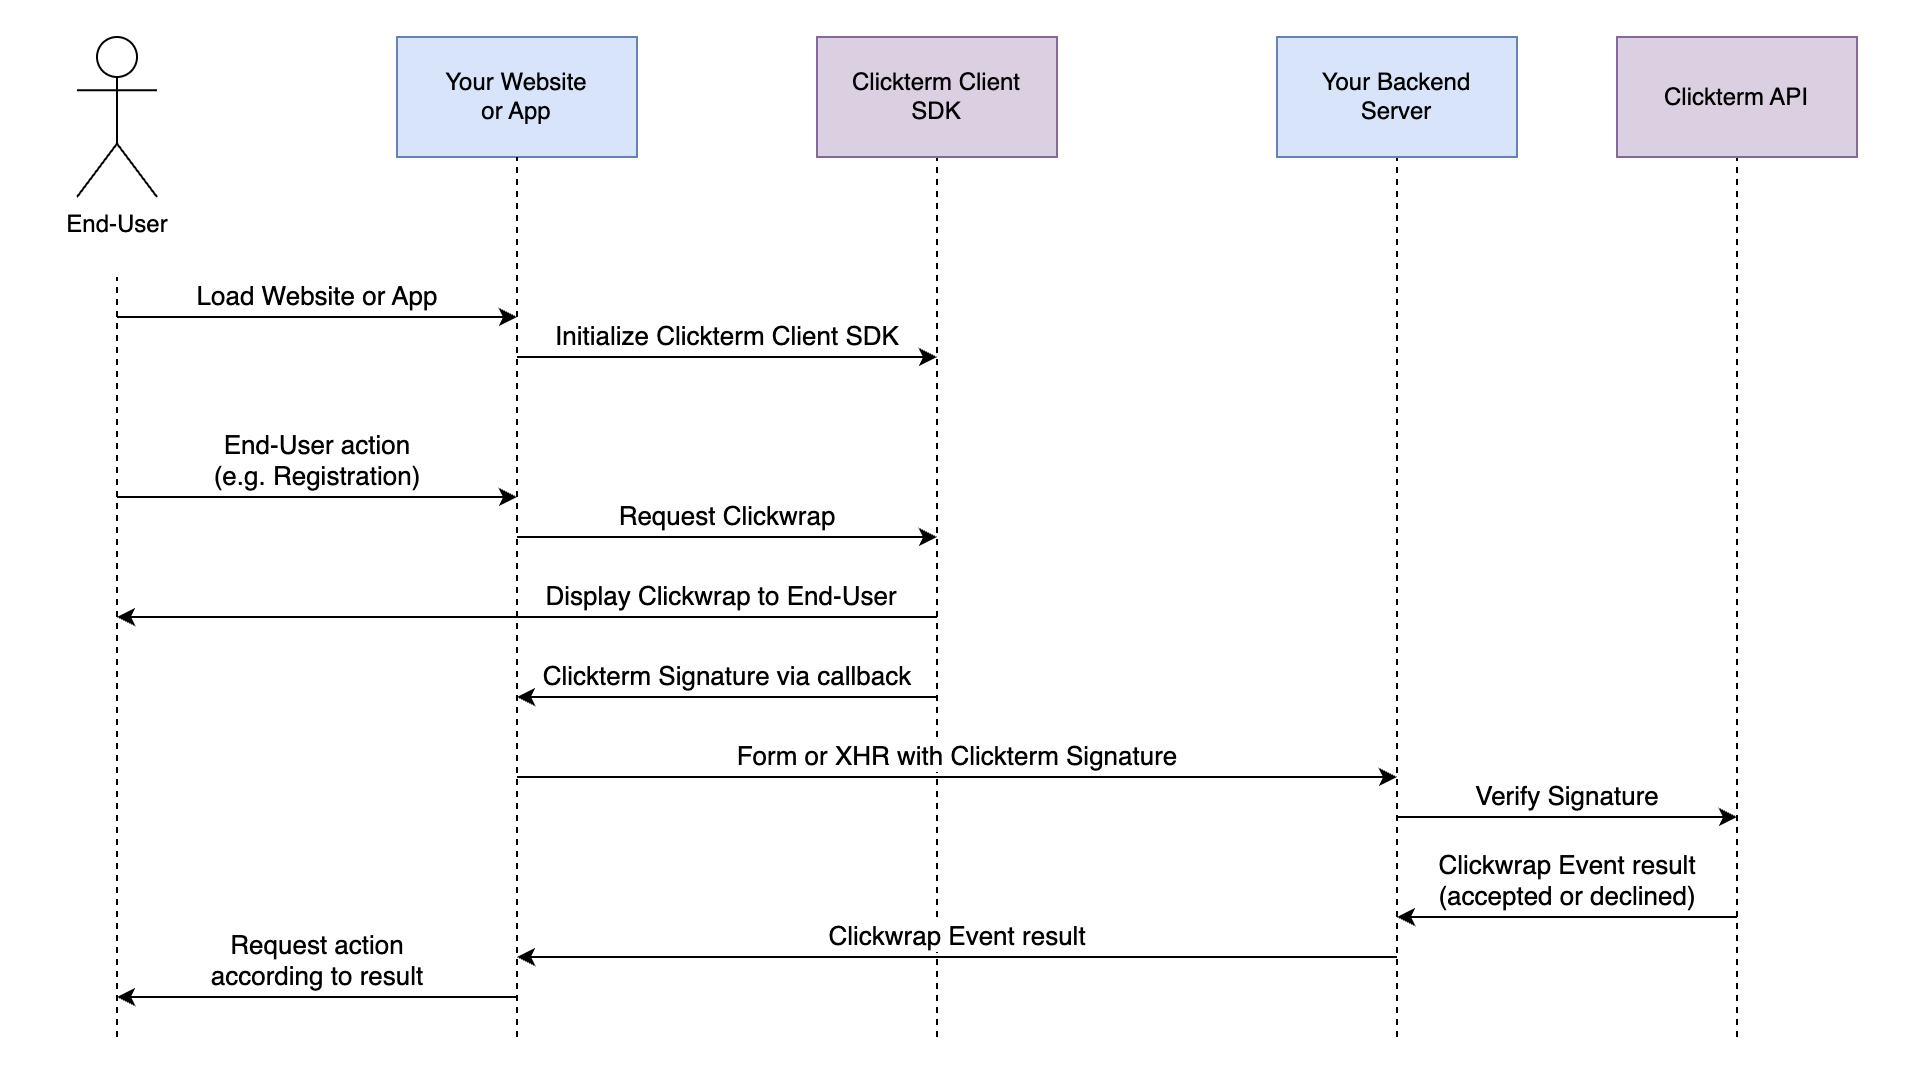
Integration Flow
The following flow is similar to that used by different Captcha providers:
- You include the Clickterm SDK on your web frontend or mobile app. For example, on your registration form.
- You make a request to retrieve a Clickwrap using our SDK
- If your end-user has not accepted the latest version of your Clickwrap Template, a modal will be displayed to him to accept or decline.
- Our SDK will receive a Signature from our server and return it to your callback.
- When the user clicks Submit, you send the Signature to your backend in the Registration form request.
- You backend server sends the Signature to our API (POST /clickwrap/verify) for verification. The response will contain the action taken by the end-user and other useful metadata. A Clickwrap Event will be recorded in our system and a Certificate of Acceptance will be generated.
- You can notify your frontend or mobile app in the response from your registration request with the action taken by the end-user on the Clickwrap (accepted or declined)
Initialize ClicktermClient
Initialization examples:
To initialize our Client SDK, you only need to provide your Clickterm AppId. You can obtain it from our Integration menu on the Clickterm web app (app.clickterm.com/integration)
// Add this script tag to the end of body in your index.html.
<script src="https://app.clickterm.com/sdk/clickterm-widget-1.0.1.min.js"></script>

// To use the client SDK you can descructure the from global window object.
<script>
    const { ClicktermClient, ClicktermDialog } = window.Clickterm;
    ClicktermClient.initialize("YOUR_CLICKTERM_APP_ID");
</script>
// Inside build.gradle (app level)
dependencies {
    // ... other dependencies
    implementation 'com.clickterm:android-sdk:1.0.1'
}

// In your Application class or MainActivity initialize the SDK with your AppId
ClicktermClient.initialize("YOUR_CLICKTERM_APP_ID");
For WEB SDK
You will just need to include a script tag in your HTML to load the SDK. After that you can initialize it with your AppId.
For Android SDK
You will need to add the dependency to your app level build.gradle file in dependencies section:
Requesting a Clickwrap
To initialize our Client SDK, you only need to provide your Clickterm AppId. You can obtain it from our Integration menu on the Clickterm web app (app.clickterm.com/integration)
This is how you can show a Clickwrap to your end user.
ClicktermDialog.show({
    endUserId: options.endUser,
    clickwrapTemplateId: options.templateId,
    templatePlaceholders: {
        "fullName": "fullName",
        "email": "[email protected]",
        "phone": "123456789",
        "company": "Clickterm",
        "jobTitle": "Developer"
    },
    language: "en" // Optional, default is "en"
}).then((result) => {
    console.log('Clickwrap result:', result);
    // This signature should be sent to your backend ...
}).catch((error) => {
    console.error('Clickwrap error:', error);
});

// You can also call the dialog with configuration options:
ClicktermDialog.show({
    endUserId: options.endUser,
    clickwrapTemplateId: options.templateId,
    templatePlaceholders: {
        "fullName": "fullName",
    },
    language: "en" // Optional, default is "en"
}, {
    disableClose: true, // Do not let the user close the dialog without accepting
    mode: 'scroll' // 'scroll' | 'checkbox'
}).then((result) => {
    console.log('Clickwrap result:', result);
    // This signature should be sent to your backend ...
}).catch((error) => {
    console.error('Clickwrap error:', error);
});
Map<String, Object> templatePlaceholders = new HashMap<>();
templatePlaceholders.put("fullName", "fullName");
templatePlaceholders.put("email", "[email protected]");
templatePlaceholders.put("phone", "123456789");
templatePlaceholders.put("company", "Clickterm");
templatePlaceholders.put("jobTitle", "Developer");

ClickwrapTemplate contentRequestBody = new ClickwrapTemplate("YOUR_CLICKTERM_TEMPLATE_ID", endUserID, templatePlaceholders, "LANGUAGE_CODE");
ClicktermDialogConfig dialogConfig = new ClicktermDialogConfig.Builder().setMode(ClicktermDialogConfig.Mode.CHECKBOX).build(); // Optional configuration
ClicktermDialog.show(this, contentRequestBody, dialogConfig, new ClicktermDialog.OnAgreementResultListener() {
    @Override
    public void onSuccess(String clicktermSignature) {
        if (clicktermSignature == null) {
            Log.i("Clickterm result: ", "No signature received, user has already acted on the agreement.");
        } else {
            Log.i("Clickterm result: ", clicktermSignature);
            // This signature should be sent to your backend ...
        }
    }

    @Override
    public void onError(String message) {
        Log.e("Clickterm", message);
    }
});
To request a new Clickwrap, you need to provide the following parameters:
| Parameter | Required | Description |
|---|---|---|
| clickwrapTemplateId | Yes | The ID of your Clickwrap template. You can obtain this from the Clickterm web app after creating a template. |
| endUserId | Yes | String 256 max length. The identifier we will use in Clickterm to identify your endUser's events. If your userId is not known yet you can generate a UUID and map it to your userId in your backend |
| templatePlaceholders | No | Values that are to be replaced in the placeholders you set in your Clickwrap Template. These should be URLEncoded. |
| language | No | Default: "en". The language to request from your template supported languages. |
Verify a Signature
This endpoint lets you verify a Clickterm Signature that was generated when a user accepted a clickwrap (e.g. terms and conditions).
- Your backend receives the signature from the client (website/app).
- You then send it to Clickterm’s /clickwrap/verify API with your appId and appKey.
- Our system confirms that the signature is authentic and issued by Clickterm, and provides a Certificate of Acceptance
Why it matters: Verification ensures the signature hasn’t been forged or tampered with, providing proof of consent, security, and legal validity for clickwrap agreements.
Endpoint
POST https://api.clickterm.com/public-client/v1/clickwrap/verify
Verify Signature CURL Examples:
curl -XPOST -H 'X-APP-ID: {YOUR_APP_ID}'
            -H 'X-APP-KEY: {YOUR_APP_KEY}'
            -H "Content-type: application/json"
            -d '{ "clicktermSignature": "{SIGNATURE}"}'
            'https://api.clickterm.com/public-client/v1/clickwrap/verify'
curl -XPOST -H 'X-APP-ID: {YOUR_APP_ID}'
            -H 'X-APP-KEY: {YOUR_APP_KEY}'
            -H "Content-type: application/json"
            -d '{ "clicktermSignature": "{SIGNATURE}"}'
            'https://api.clickterm.com/public-client/v1/clickwrap/verify'
Request body
The request body should be a JSON object with the following structure:
// JSON Request Body

{
    "clicktermSignature": "{SIGNATURE}"
}
// JSON Request Body

{
    "clicktermSignature": "{SIGNATURE}"
}
To verify a Clickterm Signature you need to send a POST request to our Public API from your backend server. You will need to include your Clickterm App Id and Clickterm App Key. You can obtain them from our Integrations menu on the Clickterm web app app.clickterm.com/integrations
To request a new Clickwrap, you need to provide the following parameters:
| Parameter | Required | Description |
|---|---|---|
| clicktermSignature | Yes | The Clickterm Signature sent to your backend from your Client (Website or App). It's returned when a new Clickwrap was requested and shown to the end-user |
Response body
The response body will be a JSON object with the following structure:
{
  "clickwrapEventStatus": "string (enum: e.g. ACCEPTED, DECLINED)",
  "clickwrapEventId": "string (UUID)",
  "clickwrapTemplateId": "string (UUID)",
  "clickwrapTemplateVersion": "integer",
  "clickwrapTemplateVersionMinor": "integer",
  "endUserId": "string(256)",
  "templatePlaceholders": "string (nullable, JSON-encoded or null)",
  "technicalMetadata": "string (256)",
  "actionAt": "string (ISO-8601 timestamp)"
}

// Example:
{
  "clickwrapEventStatus": "ACCEPTED",
  "clickwrapEventId": "123e4567-e89b-12d3-a456-426614174000",
  "clickwrapTemplateId": "987e6543-e21b-45d3-b321-426614174999",
  "clickwrapTemplateVersion": 1,
  "clickwrapTemplateVersionMinor": 0,
  "endUserId": "423e4567-e89b-12d3-a456-426614174000",
  "templatePlaceholders": "{ \"email\": \"[email protected]\", \"phone\": \"+12345678900\" }",
  "technicalMetadata": "{\"userAgent\":\"okhttp/4.8.1\",\"ip\":\"a100:a100:a100:a100:a100:a100:a100:a100\"}",
  "actionAt": "2025-08-20T14:30:00Z",
}
{
  "clickwrapEventStatus": "string (enum: e.g. ACCEPTED, DECLINED)",
  "clickwrapEventId": "string (UUID)",
  "clickwrapTemplateId": "string (UUID)",
  "clickwrapTemplateVersion": 1,
  "clickwrapTemplateVersionMinor": 0,
  "endUserId": "string(256)",
  "templatePlaceholders": "string (nullable, JSON-encoded or null)",
  "technicalMetadata": "string (256)",
  "actionAt": "string (ISO-8601 timestamp)"
}
This request returns the following information:
| Parameter | Type | Description |
|---|---|---|
| clickwrapEventStatus | String | The result from the user's interaction with the Clickwrap modal dialog. (ACCEPTED or DECLINED). |
| clickwrapEventId | UUID | The Id of this partucular Clickwrap Event. Can also be consulted on the Clickterm web app. |
| clickwrapTemplateId | UUID | The Id of the Clickwrap Template shown to the end-user. |
| clickwrapTemplateVersion | Integer | The version of the Clickwrap Template used for this event. |
| clickwrapTemplateVersionMinor | Integer | The minor version of the Clickwrap Template used for this event. |
| endUserId | String | The endUser identifier linked to this Event |
| templatePlaceholders | String | The list of values that was used to replace the placeholders in your Clickwrap Template. |
| technicalMetadata | String | The metadata gathered from the end-user client at the time of the Event (IP Address, user-agent, etc) |
| actionAt | Timestamp | The timestamp the user's action took place at for this Clickwrap Event. |
Download Certificate of Acceptance
This endpoint lets you retrieve the Certificate of Acceptance for a Clickterm Event that has been verified and has clickwrapEventStatus: accepted.
Certificate of Acceptance: A digitally signed PDF that proves a specific user accepted a specific Clickwrap Version at a specific time.
The certificate includes metadata such as the user ID, timestamp, IP Address, user-agent (browser/device information). Stored in imutable s3 storage at the time of Clickterm Event Verification. It serves as admissible proof in legal and compliance contexts.
Endpoint
GET https://api.clickterm.com/public-client/v1/clickwrap-events/{clickwrapEventId}/certificate
Verify Signature CURL Examples:
curl -XGET -H 'X-APP-ID: {YOUR_APP_ID}'
            -H 'X-APP-KEY: {YOUR_APP_KEY}'
            'https://api.clickterm.com/public-client/v1/clickwrap-events/{clickwrapEventId}/certificate'
curl -XGET -H 'X-APP-ID: {YOUR_APP_ID}'
            -H 'X-APP-KEY: {YOUR_APP_KEY}'
            'https://api.clickterm.com/public-client/v1/clickwrap-events/{clickwrapEventId}/certificate'
URL Parameters
| URL Parameter | Required | Description |
|---|---|---|
| clickwrapEventId | Yes | The identifier for the Clickwrap Event from which you want to retrieve the Certificate of Acceptance. |
Show Agreed Content
You can call showAcceptedContent to show the agreed content to your end user if they have already accepted the Clickwrap template. Please make sure you have initialized the SDK as shown in the Initialization section.
This is how you can show the agreement to your end user.
ClicktermDialog.showAcceptedContent({
    endUserId: options.endUser,
    clickwrapTemplateId: options.templateId,
}).then((result) => {
    console.log('Clickwrap result:', result);
    // The response will contain the agreed content ...
}).catch((error) => {
    console.error('Clickwrap error:', error);
});
ClickwrapAcceptedAgreementRequest request = new ClickwrapAcceptedAgreementRequest(templateId, endUserId, "en");
ClicktermDialog.showAcceptedContent(this, request, new ClicktermDialog.OnAcceptedContentListener() {
    @Override
    public void onSuccess(ClickwrapTemplateContent content) {
        Log.i("Clickterm result: ", content.getContent());
        // The response will contain the agreed content ...
    }

    @Override
    public void onError(String message) {
        Log.e("Clickterm error: ", message);
    }
});
To request the accepted content, you need to provide the following parameters:
| Parameter | Required | Description |
|---|---|---|
| clickwrapTemplateId | Yes | The ID of your Clickwrap template. You can obtain this from the Clickterm web app after creating a template. |
| endUserId | Yes | String 256 max length. The identifier we will use in Clickterm to identify your endUser's events. If your userId is not known yet you can generate a UUID and map it to your userId in your backend |
Errors
Clickterm uses the following error codes that also correspond to HTTP status codes:
| Error Code | Meaning |
|---|---|
| 400 | Bad Request -- Your request is invalid. More details will be present with the response. |
| 401 | Unauthorized -- Your appId, appKey or token is incorrect. |
| 403 | Forbidden -- You are not allowed to access this resource. |
| 404 | Not Found -- The specified APPID is not valid or the template could not be found. |
| 405 | Method Not Allowed -- You tried to a method not supported by our API |
| 406 | Not Acceptable -- You requested a format that isn't JSON. |
| 409 | Conflict -- You are trying to create a resource that already exists. |
| 500 | Internal Server Error -- We had a problem with our service. Please contact our support team for assistance. |
| 503 | Service Unavailable -- We're temporarily offline for maintenance. Please try again later. |